Just did mine today, figured I'd document it in case anyone else was going to do the project. If you can do brakes, the rear hub assemble is easy.
Hardest part is getting the rotors off :banghead:
With just regular hand tools (no air wrench) it took me about 45 minutes to do the first side, and about 35 minutes for the other side, from the time I loosened the first lug nut until the time I had the last one tightened.
**NOTE** My car does not have ABS. IF yours does, I believe you have to remove and set aside the sensor for the ABS wheel unit, maybe someone else can chime in on that.
You will need:
#17 and #19 socket, and a ratchet **NOTE** Get 6-point sockets if you can, rather than the usual 12-point ones. I got a set of metric ones at Sears for about 10 bucks, well worth it, especially then trying to get a bolt off the back side of something, much less slippage, no stripped corners, no busted knuckles.
Lug Wrench
maybe some PB blaster
A wire coat hanger
Torque wrench would be nice
Two new rear hub/bearing assemblies (about $60 each, I got free shipping thru Amazon).
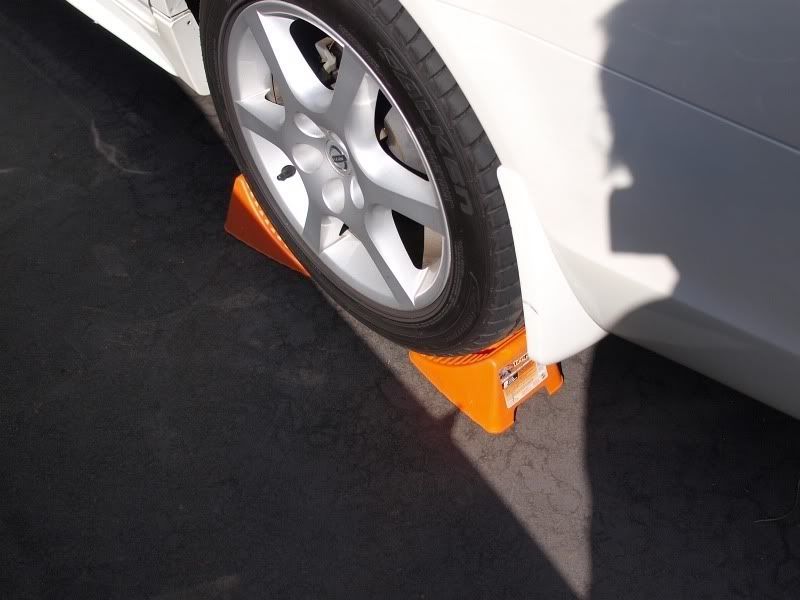
1) Slightly loosen your lugnuts, then jack up the car. Chock wheels in each direction on the other side, because you NOT going to be able to have the Parking Brake set.
![Image]()
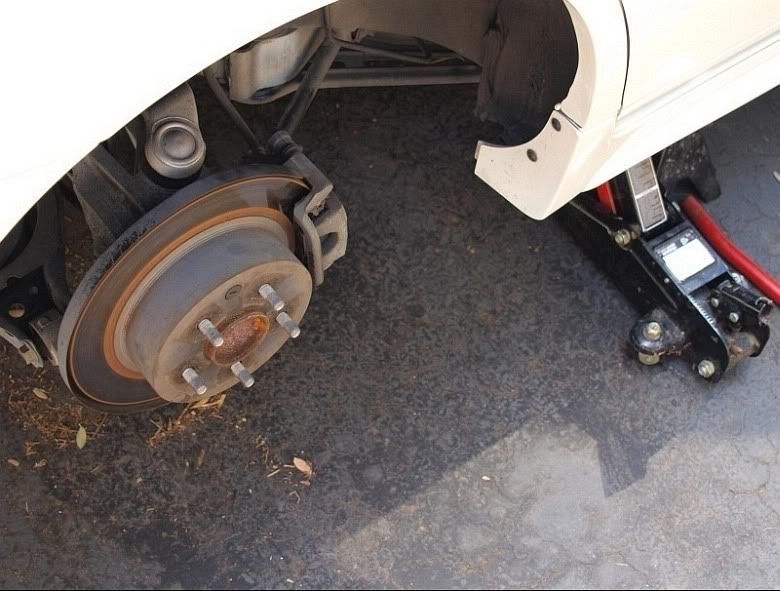
2) Use a jack and a stand for safety! Remove the already-loose lug nuts and remove the wheel. DON'T SCRATCH YOUR ALLOYS!
![Image]()
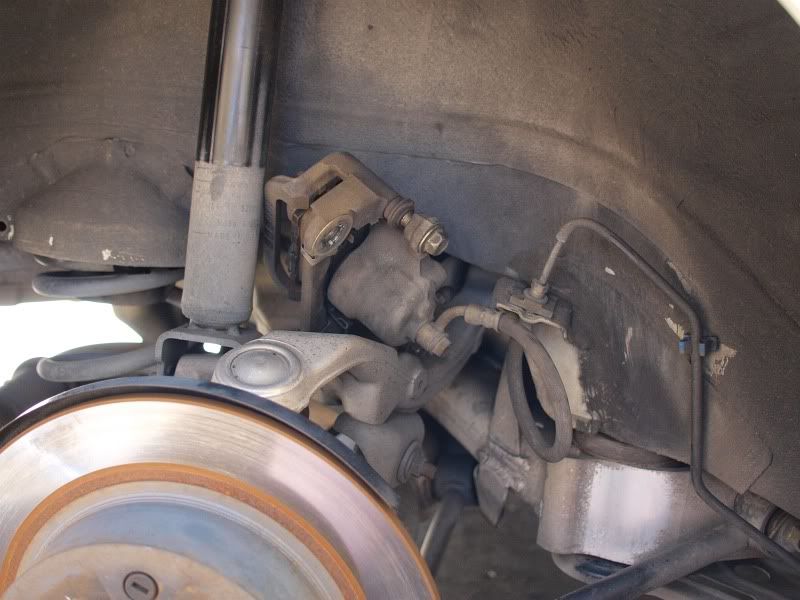
3) Use your ratchet to remove the 2 19mm nuts that hold on the caliper: they are on the back of the caliper, but you can get to both without any special tools or extensions.
Once removed, you can set the caliper assembly on top of the aluminum suspension/steering unit, but use a wire that you wrap around the shock just to keep it secure while you are cranking and banging on the other stuff.
![Image]()
4) Remove the rotor, this is the hard part unless you have had yours off lately. Not enough room to give it a decent wack, I used a rubber mallet and on both sides I did not think I was making any progress, then is suddenly loosened up. So be patient.
5) Set the rotor aside, and now you get to remove the 4 17mm bolts that hold on the hub assembly from the rear. Don't worry, they are all accessible with regular tools and no extensions are really needed.
YOU DO NOT NEED TO DO ANYTHING TO THE E-BRAKE, it stays in place, so leave the cable alone, regardless of what you have read elsewhere! You will see why in a minute...
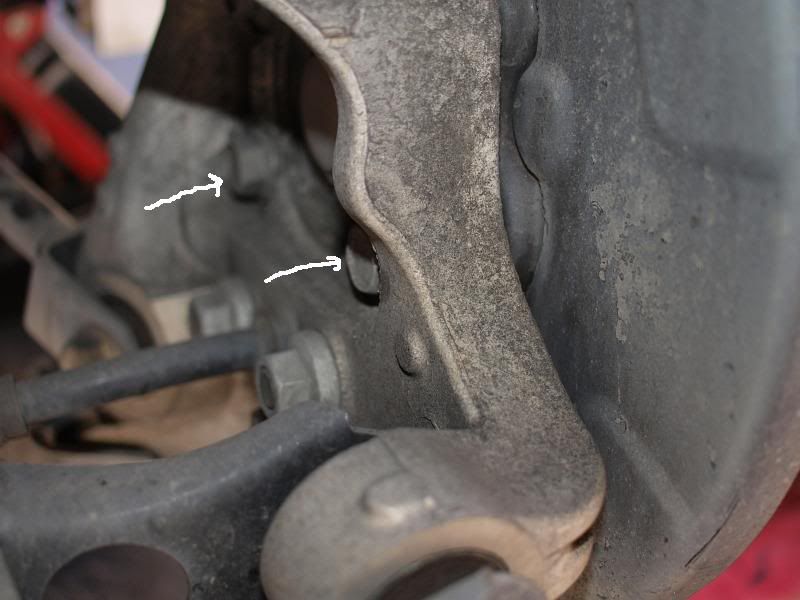
Here are two of the 4 bolts you have to loosen and remove
![Image]()
The other two are above the two you see there. On one side I had to use PB Blaster, the other side came out with no problem. Don't use PB Blaster until you have the rotor OFF, and don't get it near the E-brake shoes.
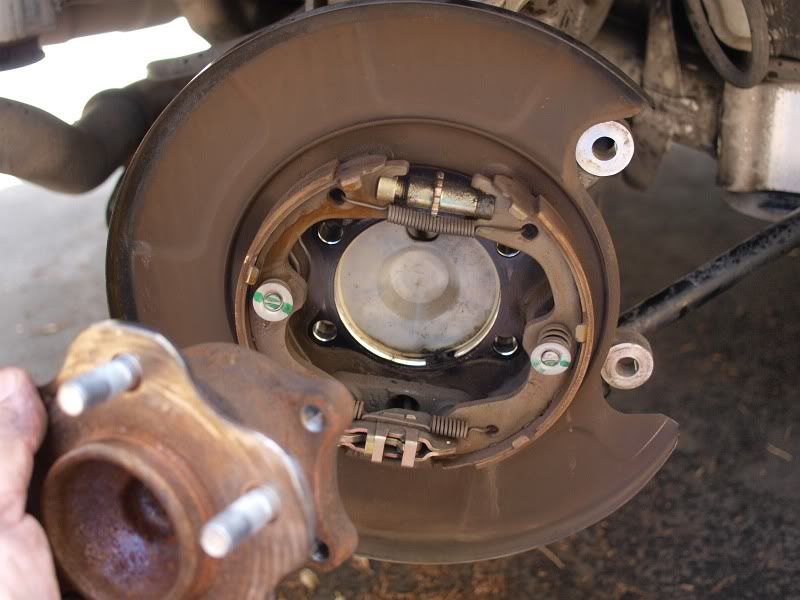
Once you have the 4 bolts off, the hub/bearing just basically falls out.
Not sure why it takes 5 lugs to hold the wheel to the hub, when the entire hub only has 4 bolts :crazy:
Here is what things look like with the hub removed
![Image]()
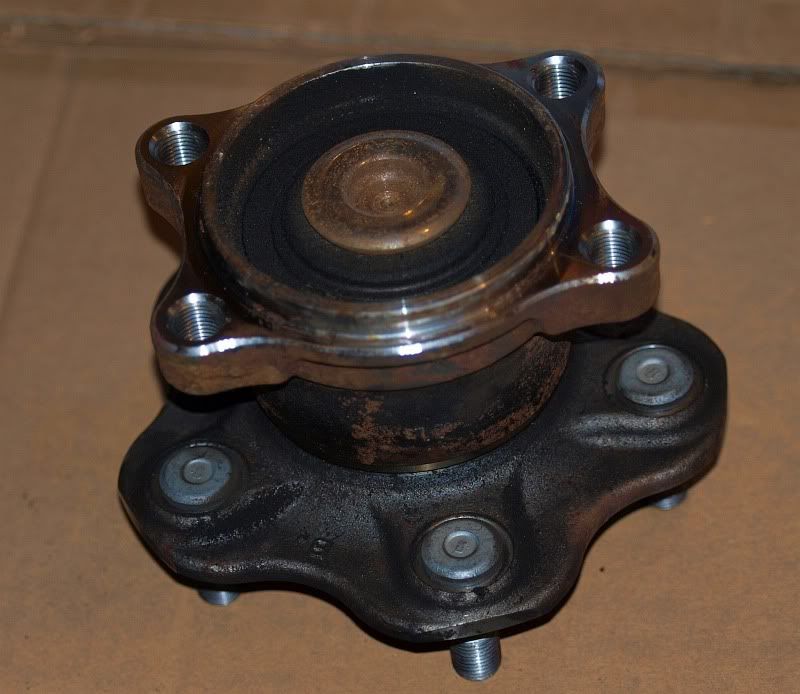
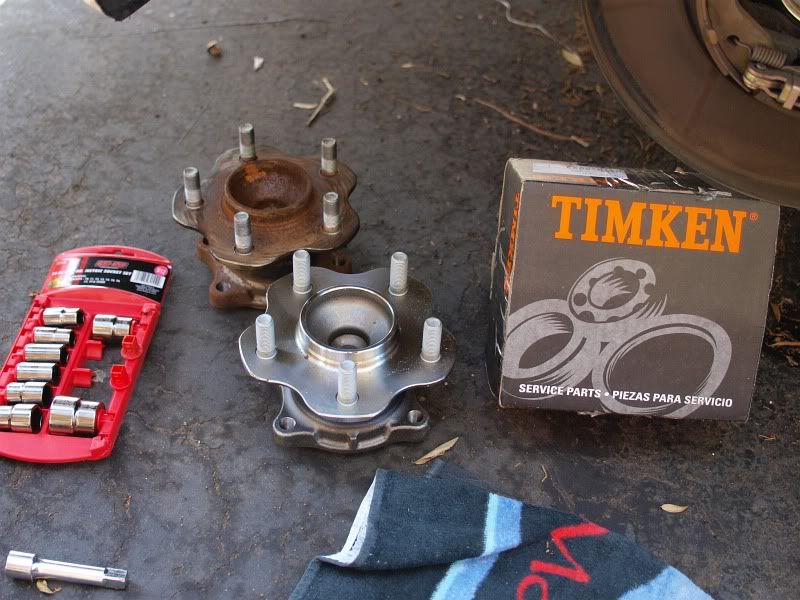
Old/new hub unit
![Image]()
Install is easy, just reverse the steps, torque everything to 85lbs. Make sure the calipers have all the washers and clips in the right place when you put them back on, they tend to move around easily.
You should clean off the rotors with some Brakleen while you have them off, just to get your greasy fingerprints off them. I used it to blast off the crud from the E-Brake assembly as well.
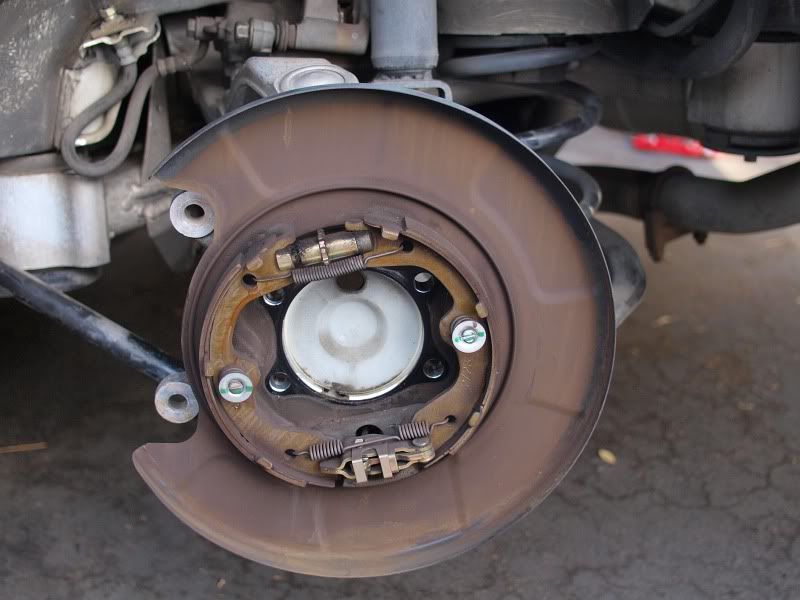
This shows you why you do not need to mess with the E-brake assembly. The hubs come right out without touching it.
![Image]()
Good luck, don't forget to torque your lugs to 85 lbs and check them again in about 100 miles.
Usual disclaimers apply, don't attempt this if you are unsure of what you are doing, seek professional help, your mileage may vary!
Hardest part is getting the rotors off :banghead:
With just regular hand tools (no air wrench) it took me about 45 minutes to do the first side, and about 35 minutes for the other side, from the time I loosened the first lug nut until the time I had the last one tightened.
**NOTE** My car does not have ABS. IF yours does, I believe you have to remove and set aside the sensor for the ABS wheel unit, maybe someone else can chime in on that.
You will need:
#17 and #19 socket, and a ratchet **NOTE** Get 6-point sockets if you can, rather than the usual 12-point ones. I got a set of metric ones at Sears for about 10 bucks, well worth it, especially then trying to get a bolt off the back side of something, much less slippage, no stripped corners, no busted knuckles.
Lug Wrench
maybe some PB blaster
A wire coat hanger
Torque wrench would be nice
Two new rear hub/bearing assemblies (about $60 each, I got free shipping thru Amazon).
1) Slightly loosen your lugnuts, then jack up the car. Chock wheels in each direction on the other side, because you NOT going to be able to have the Parking Brake set.
2) Use a jack and a stand for safety! Remove the already-loose lug nuts and remove the wheel. DON'T SCRATCH YOUR ALLOYS!
3) Use your ratchet to remove the 2 19mm nuts that hold on the caliper: they are on the back of the caliper, but you can get to both without any special tools or extensions.
Once removed, you can set the caliper assembly on top of the aluminum suspension/steering unit, but use a wire that you wrap around the shock just to keep it secure while you are cranking and banging on the other stuff.
4) Remove the rotor, this is the hard part unless you have had yours off lately. Not enough room to give it a decent wack, I used a rubber mallet and on both sides I did not think I was making any progress, then is suddenly loosened up. So be patient.
5) Set the rotor aside, and now you get to remove the 4 17mm bolts that hold on the hub assembly from the rear. Don't worry, they are all accessible with regular tools and no extensions are really needed.
YOU DO NOT NEED TO DO ANYTHING TO THE E-BRAKE, it stays in place, so leave the cable alone, regardless of what you have read elsewhere! You will see why in a minute...
Here are two of the 4 bolts you have to loosen and remove
The other two are above the two you see there. On one side I had to use PB Blaster, the other side came out with no problem. Don't use PB Blaster until you have the rotor OFF, and don't get it near the E-brake shoes.
Once you have the 4 bolts off, the hub/bearing just basically falls out.
Not sure why it takes 5 lugs to hold the wheel to the hub, when the entire hub only has 4 bolts :crazy:
Here is what things look like with the hub removed
Old/new hub unit
Install is easy, just reverse the steps, torque everything to 85lbs. Make sure the calipers have all the washers and clips in the right place when you put them back on, they tend to move around easily.
You should clean off the rotors with some Brakleen while you have them off, just to get your greasy fingerprints off them. I used it to blast off the crud from the E-Brake assembly as well.
This shows you why you do not need to mess with the E-brake assembly. The hubs come right out without touching it.
Good luck, don't forget to torque your lugs to 85 lbs and check them again in about 100 miles.
Usual disclaimers apply, don't attempt this if you are unsure of what you are doing, seek professional help, your mileage may vary!